No products in the cart.
 19Jan
19Jan 

Did you know that nearly 47% of brides never wear their wedding dress again after their big day? That stunning gown, often costing between $1,500 and $3,000, typically ends up collecting dust in a closet or storage box for decades. But what if I told you there’s a transformative solution that’s been quietly trending among sustainable fashion enthusiasts and creative brides alike?
Learning how to dye a wedding dress has become one of the most searched bridal fashion topics, with Pinterest reporting a 156% increase in “wedding dress transformation” pins over the past two years. Whether you want to breathe new life into a vintage heirloom, create a unique ceremony look, or simply repurpose your gown into something wearable for future events, dyeing your wedding dress offers endless possibilities.
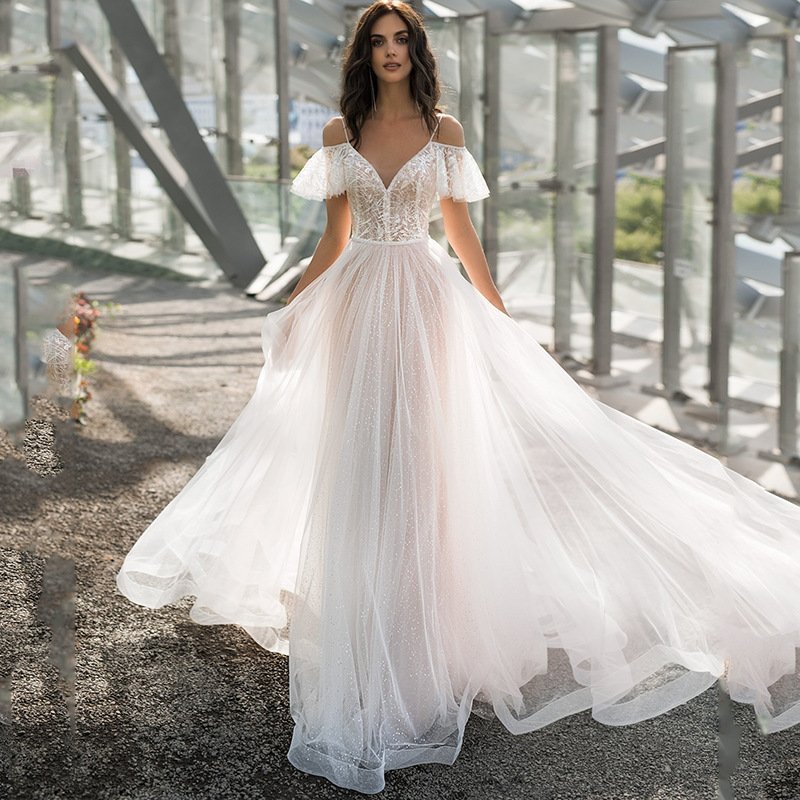
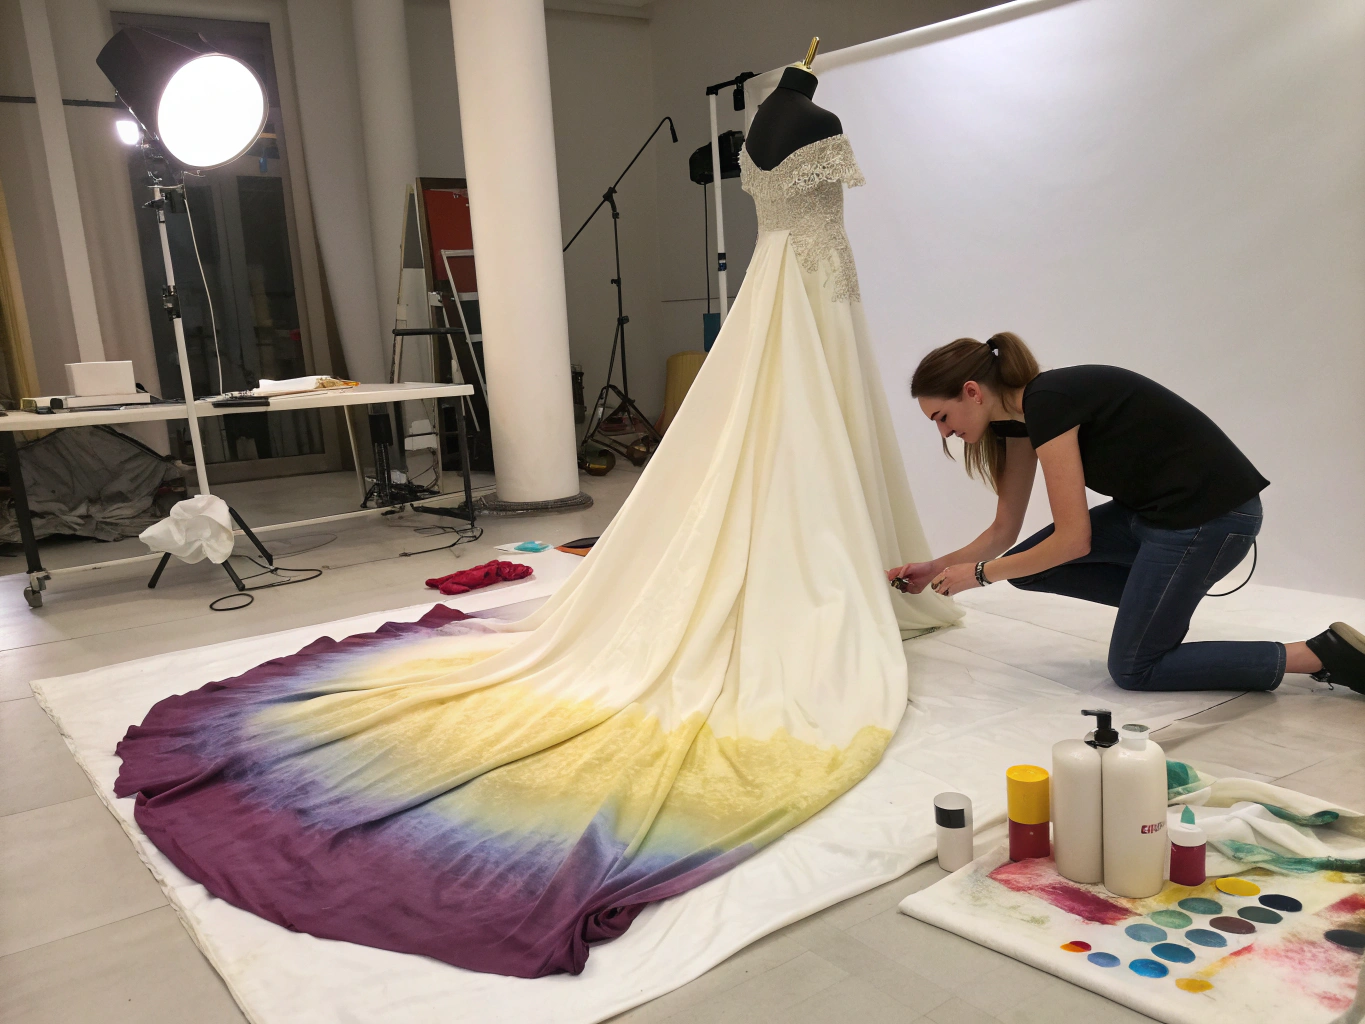
I’ll never forget the moment my best friend showed me her grandmother’s yellowed 1960s wedding gown and asked if it could be saved. Six months later, she walked down the aisle in that same dress—transformed into a breathtaking blush pink masterpiece. That experience taught me everything about the delicate art of dyeing bridal fabrics, and now I’m sharing those insights with you.
This comprehensive guide will walk you through everything you need to know about how to dye a wedding dress, from gathering your essentials to achieving professional-quality results at home. Let’s transform that white gown into something truly extraordinary.
Before you begin your wedding dress dyeing journey, gathering the right materials is absolutely crucial. Trust me—I’ve seen too many DIY disasters that could have been avoided with proper preparation. Here’s your complete checklist:
Fabric Dye Selection:
Substitution tip: If you can’t find fiber-reactive dyes locally, natural dyes like avocado pits create gorgeous dusty rose tones, while black tea produces elegant ivory and champagne shades.
Equipment Essentials:
Protective Supplies:
The sensory experience of selecting your dye color is honestly one of my favorite parts. Imagine holding that powder in your gloved hand, knowing it will transform crisp white satin into romantic dusty mauve or sophisticated sage green. There’s something almost magical about it.
Let’s talk real numbers because time management matters, especially when you’re working with such a precious garment.
Total Project Timeline: 4-8 hours (depending on desired color depth)
Here’s the breakdown:
Compare this to professional dyeing services, which typically take 2-4 weeks and cost anywhere from $200 to $800. According to a 2023 survey by The Knot, brides who chose DIY dress modifications saved an average of 65% compared to professional alterations.
I remember my first wedding dress dyeing project took me nearly 10 hours because I was so nervous about making mistakes. Now, with proper preparation, I can complete the entire process in a single afternoon. The key is having everything organized before you begin—like mise en place in cooking, but for fashion transformation.
This is arguably the most critical step in the entire process. Check the care label inside your dress—most wedding gowns contain one or more of these fabrics:
Stylist trick: If the label is missing or unreadable, perform a burn test on a hidden seam allowance. Natural fibers burn and leave ash, while synthetics melt and bead.
Different fabrics absorb dye differently—a dress with cotton lace over polyester satin will create beautiful two-toned effects because the cotton absorbs more color. I actually love this effect; it adds dimensional beauty that solid dyeing can’t achieve.
Never, ever skip this step. Wedding dresses often contain finishing agents, sizing, or invisible stains that prevent even dye absorption.
Fill your basin with warm water and add a teaspoon of Synthrapol or mild dish soap. Gently agitate your dress for 15-20 minutes, paying special attention to underarm areas and any visible spots. Rinse thoroughly until the water runs completely clear.
I learned this lesson the hard way when I skipped pre-washing a vintage gown and ended up with splotchy, uneven color. The dress had invisible champagne stains from the original wedding reception that only became visible after dyeing. Learn from my mistakes!
This is where the science meets the art. Follow these guidelines for optimal results:
For fiber-reactive dyes (cotton, linen, rayon):
For acid dyes (silk, wool, nylon):
For synthetic dyes (polyester, acetate):
The ratio matters tremendously. For medium color saturation, use approximately 1/3 cup of liquid dye or 1 package of powder dye per pound of fabric. Your wedding dress likely weighs 3-8 pounds depending on style.
Here’s where patience becomes your greatest asset. Lower your pre-dampened dress into the dye bath slowly, ensuring all fabric enters the water simultaneously to prevent tide lines.
Agitation is everything. Stir continuously for the first 10 minutes, then every few minutes thereafter. Uneven stirring creates splotchy results—I cannot stress this enough.
For ombre or dip-dye effects, gradually lower the dress into the bath over 30-60 minutes, keeping the top portion out of the water longer. This creates that gorgeous gradient effect that’s been trending heavily on Instagram and TikTok.
Remember that wet fabric appears 40-60% darker than it will look when dry. This trips up beginners constantly.
If you want deeper color:
If the color is too intense:
I keep a small white fabric swatch nearby during dyeing to test color accuracy. Dip it, squeeze it dry with a paper towel, and you’ll get a more accurate preview of your final shade.
This stage requires patience and plenty of water. Start with warm water (matching the dye bath temperature to prevent shocking delicate fabrics), then gradually transition to cooler water.
Continue rinsing until absolutely no color transfers to white paper towels. For fiber-reactive dyes, this typically takes 15-20 minutes of continuous rinsing.
Follow with a final wash using Synthrapol or a gentle detergent to remove any unbonded dye molecules. This step is crucial for preventing color bleeding onto other garments later.
Never wring your wedding dress. The delicate beading, lace, and embellishments can be damaged by twisting.
Instead:
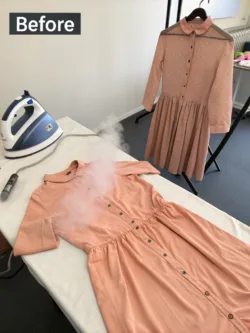
Once dry, press on the appropriate setting for your fabric using a pressing cloth between the iron and dress. Steam works beautifully for removing wrinkles without direct heat contact.
Understanding fabric behavior post-dyeing helps you maintain that perfect fit and comfort level.
Natural fibers (silk, cotton) may experience slight shrinkage—typically 1-3%—during the hot water dyeing process. According to textile research from North Carolina State University, pre-washing in hot water before dyeing minimizes this effect by up to 85%.
Synthetic fabrics maintain their shape but may feel slightly stiffer after dyeing. A fabric softener in the final rinse restores that luxurious drape you love.
I dyed a silk charmeuse gown last summer during a heatwave and was pleasantly surprised by how breathable it remained. Silk’s natural temperature-regulating properties (it keeps you cool in summer and warm in winter) weren’t affected by the acid dyeing process at all.
Pro tip: If your dress has a built-in corset or boning, the structural elements won’t absorb dye. This can actually create interesting visual contrast, but consider this in your color planning.
Embracing dress dyeing aligns perfectly with the growing sustainable fashion movement. The EPA estimates that 11.3 million tons of textile waste reaches landfills annually—repurposing your wedding dress directly combats this statistic.
Eco-Friendly Dye Options:
Budget-Friendly Approach:
A complete DIY dyeing kit costs approximately $30-50, compared to $300+ for professional services. Brands like Rit, Dharma Trading, and Jacquard offer quality dyes at accessible price points.
Creative idea: For ultra-budget transformations, tea dyeing costs virtually nothing. Steep 15-20 tea bags in your largest pot, and you’ll achieve that coveted vintage champagne color brides pay premium prices for.
I’ve personally used avocado dye on three dresses now, and the sustainable aspect makes the slightly longer process absolutely worthwhile. Plus, you get to eat guacamole during your dyeing project!
Once your dress transforms from traditional white, styling possibilities expand dramatically.
For Spring Events:
For Summer Garden Parties:
For Autumn Celebrations:
For Winter Occasions:
Petite styling tip: If you’re under 5’4″, stick with monochromatic accessories that match your dyed dress color. This creates an unbroken vertical line that elongates your silhouette beautifully.
After years of helping brides transform their gowns, I’ve seen these mistakes repeatedly:
Mistake 1: Choosing the wrong dye type
Fix: Always match your dye chemistry to your fabric content. A 2022 textile study showed that using acid dyes on cotton results in 70% color loss after just three washes.
Mistake 2: Forgetting about embellishments
Fix: Beading, sequins, and embroidery often won’t absorb dye, creating contrast. Either embrace this effect or remove embellishments before dyeing.
Mistake 3: Rushing the process
Fix: Set aside an entire day. Rushed dyeing leads to uneven results that are nearly impossible to correct.
Mistake 4: Testing on the visible dress first
Fix: Always test your dye solution on the innermost seam allowance or a similar fabric swatch.
Mistake 5: Using too small a container
Fix: Your dress needs room to move freely. Cramped conditions create fold lines and uneven saturation.
Protecting your newly dyed masterpiece requires specific care protocols.
Washing Guidelines:
Storage Recommendations:
Pro tip: I keep silica gel packets in my garment bags to absorb moisture and prevent mildew. This simple addition extends fabric life significantly.
For colored fabrics, the Dry Cleaning and Laundry Institute recommends professional cleaning every 12-18 months for stored garments to prevent fiber degradation.
Transforming your wedding dress through dyeing isn’t just a craft project—it’s an act of creative reinvention and sustainable fashion consciousness. By following these 7 simple steps for stunning results, you can breathe entirely new life into a garment that might otherwise remain forgotten.
Whether you’re reimagining a family heirloom, customizing your ceremony gown, or repurposing your dress for future events, the skills you’ve learned here open endless possibilities. Remember: proper preparation, patience during the process, and careful aftercare are your three pillars of success.
Your next step? Gather your supplies, identify your fabric content, and start planning your color transformation. I’d love to see your results—share your before and after photos in the comments below or tag us on social media!
Ready to explore more creative fashion transformations? Check out our guides on vintage dress restoration, sustainable bridal fashion, and seasonal capsule wardrobes for more styling inspiration.
Absolutely! However, understand that most beads, sequins, and synthetic embellishments won’t absorb dye. This creates beautiful contrast effects, but plan your color choice accordingly. If you want uniform color, consider removing embellishments before dyeing.
Lighter shades work most reliably—think blush pink, champagne, lavender, sage green, or light blue. These colors require less dye and produce more predictable results. Darker colors like navy or black are possible but require more dye, longer processing, and work best on natural fiber dresses.
When done properly with appropriate dyes and temperatures, dyeing shouldn’t damage your dress. The main risks are shrinkage (mitigated by pre-washing) and potential weakening of very old or delicate fabrics. Always test on a hidden area first.
Yes, but it requires specific synthetic dyes (like Rit DyeMore) and near-boiling water temperatures maintained throughout the process. Polyester is more challenging to dye than natural fibers, and results are typically lighter and more pastel than with cotton or silk.
With proper dyeing technique and aftercare, your color should remain vibrant for years. Fiber-reactive dyes on cotton are particularly colorfast. Expect some gradual fading with repeated washing and sun exposure, similar to any colored garment.
Color removal is possible but tricky. Products like Rit Color Remover can lighten results, but rarely restore pure white. For best outcomes, start with lighter colors that can be overdyed if needed, rather than committing to deep shades immediately.


 19Jan
19Jan  19Jan
19Jan  21Jan
21Jan  31Jan
31Jan