
How to Make a Wedding Dress in 7 Simple Steps at Home: A Complete DIY Bridal Guide
Introduction: How to Make a Wedding Dress
Did you know that the average American bride spends between $1,500 and $3,000 on a wedding dress she’ll wear for just one day? According to a 2024 survey by The Knot, bridal gown costs have increased by 23% over the past five years, leaving many brides searching for creative alternatives that don’t compromise on style or sentiment.
If you’ve ever wondered how to make a wedding dress in 7 simple steps at home, you’re not alone—and you’re definitely onto something magical. The DIY bridal movement has exploded recently, with Pinterest reporting a 156% increase in searches for “homemade wedding dress” since 2022. There’s something incredibly romantic about walking down the aisle in a gown you’ve crafted with your own hands, isn’t there?
I remember my cousin Sarah calling me in tears after her fifth bridal appointment ended in frustration. Nothing felt right, and her budget was tighter than the corset on those overpriced gowns. That’s when we decided to embark on a DIY wedding dress journey together—and honestly, it changed everything I thought I knew about bridal fashion.
Whether you’re a seasoned seamstress or someone who’s barely threaded a needle, this comprehensive guide will walk you through creating your dream wedding dress at home. Trust me, with the right materials, patience, and guidance, you can design something truly breathtaking that tells your unique love story.
Wardrobe Essentials List: Your Complete Wedding Dress Materials Kit
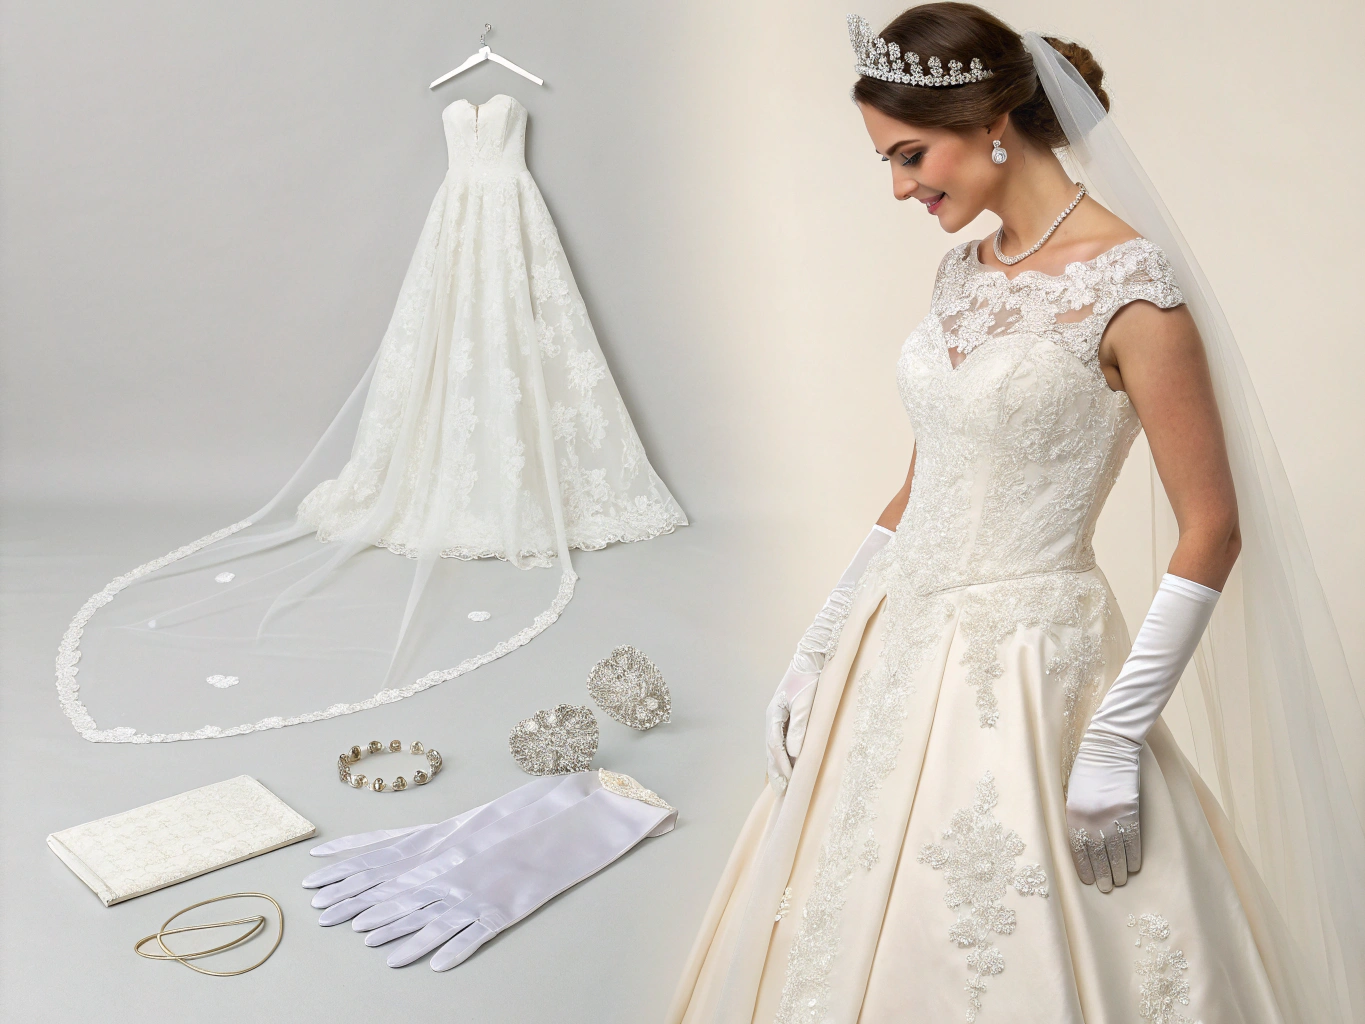
Before diving into the creation process, let’s gather everything you’ll need. Think of this as your bridal toolkit—the foundation upon which your dream gown will come to life.
Primary Fabrics
Main Dress Fabric (4-8 yards depending on style):
- Silk Charmeuse: Luxuriously smooth with a subtle sheen that catches candlelight beautifully. It drapes like liquid moonlight against your skin—pure elegance.
- Mikado Silk: Structured yet graceful, perfect for ball gowns or A-line silhouettes. This fabric holds its shape magnificently.
- Chiffon: Ethereal and romantic, ideal for overlays, sleeves, or flowing trains. It feels like wearing whispered promises.
- Crepe: Modern and minimalist, this fabric offers a sophisticated matte finish that photographs incredibly well.
Budget-Friendly Swap: If silk feels too expensive, high-quality polyester satin or duchess satin offers similar visual appeal at a fraction of the cost. I’ve worked with both, and honestly, most guests can’t tell the difference from three feet away.
Lining and Support Materials
- Cotton voile or silk lining (3-5 yards): Keeps the dress comfortable against your skin during those emotional moments
- Tulle for petticoats (5-10 yards): Adds that dreamy volume without weighing you down
- Boning (steel or spiral): Essential for structured bodices—think of it as your dress’s internal architecture
- Interfacing: Gives structure to collars, cuffs, and waistbands
Embellishment Supplies
- Lace appliqués: Nothing says “bridal” quite like delicate Chantilly or Alençon lace
- Beads, pearls, or crystals: For that touch of sparkle that catches the light as you move
- Silk flowers or ribbon: Romantic details that personalize your gown
Notions and Tools
- Quality thread (polyester or silk)
- Sharp fabric scissors and rotary cutter
- Dress form or trusted fitting buddy
- Invisible zipper (22-inch minimum)
- Hook-and-eye closures
- Measuring tape and French curve ruler
Styling Time: What to Realistically Expect
Here’s where I need to be completely honest with you—creating a wedding dress from scratch isn’t a weekend project. However, understanding the time investment helps you plan accordingly and reduces stress significantly.
Realistic Timeline Breakdown
| Project Phase | Beginner | Intermediate | Advanced |
|---|---|---|---|
| Design & Planning | 5-8 hours | 3-5 hours | 2-3 hours |
| Pattern Creation/Fitting | 10-15 hours | 6-8 hours | 4-5 hours |
| Cutting & Assembly | 20-30 hours | 15-20 hours | 10-12 hours |
| Embellishments | 10-20 hours | 8-12 hours | 5-8 hours |
| Final Adjustments | 5-8 hours | 3-5 hours | 2-3 hours |
Total Investment: 50-80 hours for beginners, 35-50 hours for intermediate sewers
Compared to spending six months visiting bridal shops, enduring pushy consultants, and settling for “almost right,” this time feels purposeful. Sarah and I spent about 60 hours total on her dress, spread over three months. We’d put on music, open a bottle of wine, and make memories while making her gown.
According to a 2023 study by the Craft Yarn Council, 78% of crafters report that DIY projects provide significant stress relief and emotional satisfaction—exactly what you need during wedding planning chaos.
Step-by-Step Styling Guide: How to Make a Wedding Dress in 7 Simple Steps at Home
Step 1: Design Your Dream Vision
Before touching any fabric, spend time clarifying exactly what you want. This visualization phase is crucial and often overlooked.
Start by asking yourself:
- What silhouette flatters my body type? (A-line, mermaid, ball gown, sheath)
- What neckline makes me feel most beautiful? (V-neck, sweetheart, illusion, off-shoulder)
- Do I want sleeves, straps, or strapless?
- Train or no train? Chapel, cathedral, or sweep?
Pro Tip: Create a Pinterest board, but limit yourself to 20 pins. This forces you to identify your true preferences rather than getting overwhelmed by options.
Sketch your design—even if you can’t draw well. Rough outlines help communicate your vision. I always tell my clients that stick figures with dress shapes work perfectly fine!
Step 2: Take Precise Measurements
Accurate measurements are the foundation of a perfectly fitting gown. Grab a friend, a soft measuring tape, and wear the undergarments you’ll wear on your wedding day.
Essential Measurements:
- Bust: Around the fullest part, keeping tape level
- Waist: Natural waistline (where you bend naturally)
- Hips: Fullest part, approximately 8 inches below waist
- Bodice length: Shoulder to natural waist
- Full length: Shoulder to floor
- Arm length: Shoulder to wrist (if adding sleeves)
Stylist Trick: Measure twice, cut once—this old adage exists for good reason. I also recommend measuring at the same time of day each time, as our bodies naturally fluctuate slightly.
Step 3: Create or Adapt Your Pattern
You have two primary options here:
Option A: Purchase a commercial pattern from McCall’s, Simplicity, or Vogue Patterns. These include detailed instructions and are perfect for beginners. The Vogue Bridal collection offers stunning designs.
Option B: Draft your own pattern using your measurements and basic block patterns. This requires more skill but offers unlimited customization.
My Recommendation for First-Timers: Start with a commercial pattern, then modify it. Add lace sleeves from one design, incorporate the neckline from another. This hybrid approach gives you customization without overwhelming complexity.
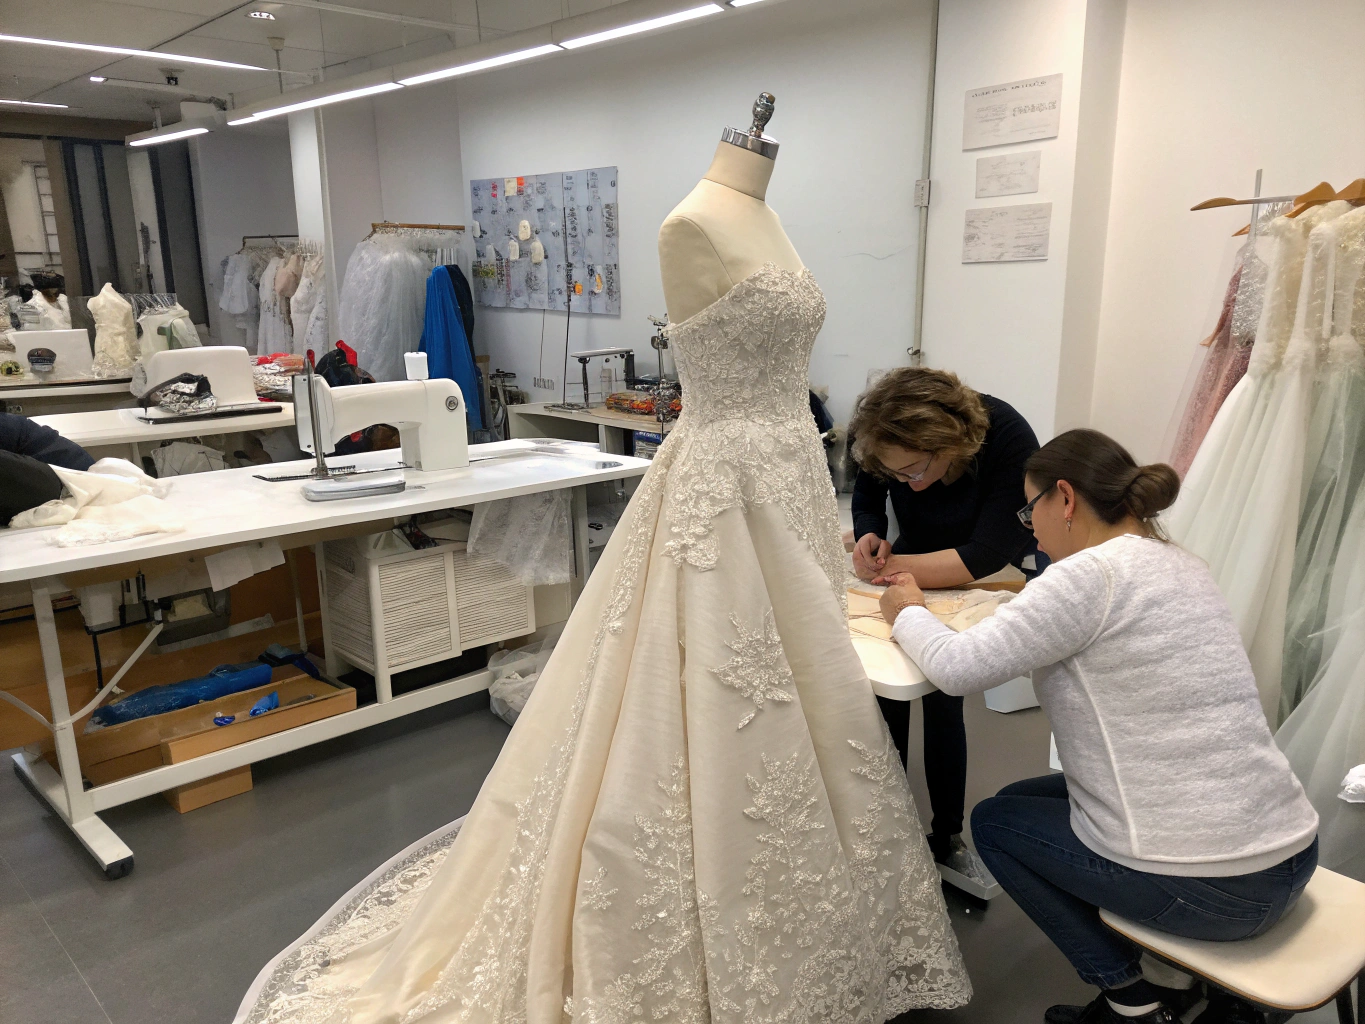
Step 4: Construct a Muslin Prototype
Never skip this step—I cannot stress this enough. A muslin (test garment) reveals fitting issues before you cut into your precious wedding fabric.
Process:
- Cut your pattern from inexpensive muslin or bedsheets
- Baste together (large, temporary stitches)
- Try it on and mark adjustments directly on the fabric
- Transfer changes to your paper pattern
- Repeat until the fit is perfect
This process might feel tedious, but it’s where the magic of a custom-fit gown really happens. Sarah and I made three muslins before her final pattern—and each version revealed something we’d have missed otherwise.
Step 5: Cut and Assemble Your Main Fabric
Now comes the exciting part—working with your actual wedding fabric!
Cutting Tips:
- Pre-wash fabric if it’s not silk (prevents future shrinkage)
- Use pattern weights instead of pins on delicate fabrics
- Cut on a large, flat surface with fabric grain lines aligned
- Label each piece immediately after cutting
Assembly Order:
- Construct the bodice (darts, seams, boning channels)
- Create the skirt panels
- Attach skirt to bodice
- Add closures (zipper, buttons, or corset back)
- Hem and bustle preparation
Encouraging Note: Take breaks. Fatigue leads to mistakes. When I felt overwhelmed helping Sarah, we’d step away for tea. Fresh eyes catch errors tired ones miss.
Step 6: Add Embellishments and Details
This step transforms a well-made dress into a wedding dress. It’s where your gown develops personality and romance.
Popular Embellishment Techniques:
- Hand-stitching lace appliqués along necklines and hemlines
- Adding beaded details to the bodice
- Creating dimensional fabric flowers
- Incorporating meaningful elements (vintage buttons from grandmother’s dress, anyone?)
Pro Tip: Less is often more. Start conservatively with embellishments—you can always add more, but removing them damages fabric. Place elements temporarily with pins, step back, photograph, and decide.
Step 7: Final Fitting and Finishing
The home stretch! Schedule your final fitting 2-3 weeks before the wedding to allow time for adjustments.
Final Checklist:
- Hem adjusted for your exact heel height
- Bustle hooks or loops attached (practice bustling several times)
- All threads trimmed and secured
- Closures functioning smoothly
- Light press with appropriate iron settings
Emotional Moment Alert: Seeing yourself in a dress you made is indescribably powerful. Have tissues ready—happy tears are guaranteed.
Fashion Fit & Comfort Insights
Understanding fabric behavior and fit principles elevates your homemade gown from amateur to professional quality.
Fabric Science for Bridal Wear
Breathability Matters: A 2023 textile study found that natural fiber blends are approximately 40% more breathable than pure synthetics. For summer weddings or warm venues, silk and cotton-lined gowns prevent uncomfortable overheating.
Weight Distribution: Heavy embellishments should concentrate on structured areas (bodice, waistband) rather than flowing sections. This prevents drooping and maintains silhouette integrity.
Movement Testing: Walk, sit, dance, and hug in your muslin prototype. Your dress should accommodate all wedding day activities without restriction. Sarah discovered her original armhole design prevented her from fully embracing her dad—we fixed that immediately.
Fit Philosophy
The Perfect Fit Feels Like:
- The bodice supports without compressing
- You can breathe deeply and eat comfortably
- The waistband sits naturally without riding up
- The hem grazes the floor at the perfect length
Body-Type Guidance:
- Pear shapes: A-line skirts with detailed bodices create balance
- Apple shapes: Empire waists elongate the torso
- Athletic builds: Structured bodices with fuller skirts add curves
- Petite frames: Clean lines without overwhelming details maintain proportion
Sustainable & Affordable Alternatives
Creating your own wedding dress is inherently more sustainable than purchasing mass-produced gowns shipped across continents. But you can maximize this eco-conscious approach further.
Budget-Friendly Material Options
| Material | Average Cost | Sustainability Rating |
|---|---|---|
| Vintage Lace Tablecloths | $20-50 | Excellent |
| Organic Cotton | $8-15/yard | Very Good |
| Deadstock Silk | $15-25/yard | Excellent |
| Recycled Polyester Satin | $5-10/yard | Good |
| Repurposed Family Gowns | Free | Perfect |
Creative Sourcing Ideas:
- Estate sales and thrift stores often have incredible vintage fabrics
- FABSCRAP (in NYC) sells designer deadstock at discounted prices
- Online fabric swaps through bridal DIY communities
- Transforming your mother’s or grandmother’s gown (meaningful and sustainable!)
Real Brand Recommendations
- Organic Cotton Plus: Ethically sourced cotton perfect for bohemian styles
- Hemp Traders: Sustainable hemp-silk blends with beautiful drape
- Renaissance Fabrics: Quality deadstock from fashion houses
Outfit Pairing Suggestions
Your wedding dress exists within a complete bridal look. Consider these pairings across different seasons and styles.
Spring/Summer Weddings
- Shoes: Strappy sandals or delicate heels in nude or metallic tones
- Jewelry: Fresh pearls, delicate chains, or floral-inspired pieces
- Hair: Loose waves with fresh flower crowns or crystal pins
Fall/Winter Weddings
- Outerwear: Faux fur stoles, velvet capes, or knitted shrugs
- Shoes: Closed-toe pumps or elegant booties
- Accessories: Statement earrings, vintage brooches, deeper metal tones
Personalization Tip for Petites: Avoid overwhelming accessories. Delicate pieces and pointed-toe shoes elongate your frame, complementing rather than competing with your gown.
Common Style Mistakes to Avoid
After helping multiple brides create their gowns, I’ve noticed recurring pitfalls. Learn from others’ experiences:
Mistake 1: Choosing Fabric Based Only on Appearance
Fix: Always feel fabric, test drape, and consider weight. That gorgeous duchess satin might be too stiff for a flowy design.
Mistake 2: Ignoring Undergarment Requirements
Fix: Plan your structural undergarments early. Some designs require specific bras, shapewear, or built-in support.
Mistake 3: Rushing the Muslin Phase
Fix: Commit to the prototype process. Skipping this step almost always results in fitting problems with the final gown.
Mistake 4: Over-Embellishing
Fix: Follow the “statement piece rule”—one major embellished area, balanced by simpler sections.
Mistake 5: Unrealistic Timeline Expectations
Fix: Start 6-9 months before your wedding date. Rush jobs create stress and compromise quality.
Clothing Care & Storage Tips
Your handmade wedding dress deserves proper care before and after your special day.
Pre-Wedding Storage
- Hang in a breathable garment bag—never plastic
- Store away from direct sunlight to prevent yellowing
- If wrinkled, steam gently (test on hidden area first)
- Keep in climate-controlled space—humidity damages delicate fabrics
Post-Wedding Preservation
- Have professionally cleaned within two weeks
- Store in acid-free tissue and archival box
- Avoid hanging long-term (causes fabric stress)
- Check annually for any issues
Pro Tip I Learned the Hard Way: Take photos of your dress before your wedding in case preservation is needed. These images help specialists identify stains or damage points.
Conclusion
Learning how to make a wedding dress in 7 simple steps at home isn’t just about saving money—though that’s certainly a wonderful benefit. It’s about infusing your wedding day with personal meaning, creative expression, and the irreplaceable satisfaction of wearing something you’ve crafted with love.
From selecting fabrics that feel like dreams against your skin to hand-stitching each delicate embellishment, every moment spent creating your gown becomes part of your wedding story. Sarah still tears up describing the moment she saw herself in her finished dress—not because it was perfect by industry standards, but because it was perfectly hers.
Whether you’re a complete beginner or experienced seamstress, I hope this guide inspires you to consider the DIY bridal path. Start with your vision, trust the process, and remember that imperfect stitches sewn with love mean more than flawless gowns made by strangers.
Ready to begin your journey? Share your design sketches in the comments, explore our seasonal bridal accessory guides, or join our DIY Bride community for support and inspiration. Your dream dress is waiting to be created—by you.
FAQs
How much does it cost to make your own wedding dress?
Depending on fabric choices and embellishments, expect to spend between $200-$800 for materials. This represents significant savings compared to average retail prices of $1,500-$3,000, while achieving comparable or superior quality.
Can I make a wedding dress with no sewing experience?
Honestly, I’d recommend having basic sewing skills before tackling a wedding dress. Consider taking a beginner sewing class or practicing with simpler garments first. However, simpler silhouettes (sheath or A-line) are more achievable for newer sewers.
How long does it take to make a wedding dress at home?
Plan for 50-80 hours total if you’re a beginner, spread across 4-6 months. Intermediate sewers typically complete projects in 35-50 hours over 2-3 months.
What’s the easiest wedding dress style to make?
A-line dresses with simple bodices are most beginner-friendly. They’re forgiving of minor fitting issues and don’t require advanced techniques like mermaid silhouettes or structured ball gowns.
Should I buy a pattern or create my own?
For first-time dress makers, I strongly recommend purchasing a commercial pattern and modifying it to your preferences. This provides tested instructions while allowing personalization.
What if I make a mistake with expensive fabric?
This is exactly why the muslin prototype phase is essential! Most mistakes can be hidden with creative embellishment placement or strategic alterations. Keep extra fabric for emergencies.


Add comment