No products in the cart.
 20Jan
20Jan 

Did you know that approximately 78% of brides struggle with managing their wedding dress train during the reception, according to a recent bridal industry survey? That gorgeous cathedral-length train that made your heart skip a beat during the ceremony can quickly become a tripping hazard, a dust collector, and honestly, a dance floor nightmare.
If you’re wondering how to make a bustle on a wedding dress, you’re not alone—and you’ve landed in exactly the right place. Learning how to create a beautiful bustle transforms your gown from a stunning ceremony showstopper into a practical, dance-ready reception dream.
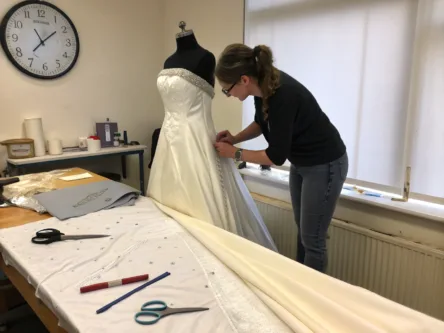
I still remember helping my best friend Sarah with her wedding dress bustle the night before her big day. She’d purchased a beautiful vintage gown online, and it arrived without any bustle attachments. Panic ensued. Three cups of coffee and countless YouTube tutorials later, we created the most elegant French bustle that had guests asking which designer crafted it. That experience sparked my obsession with understanding wedding dress construction and taught me that creating a bustle is genuinely achievable—even for beginners.
Whether you’re a DIY bride looking to save money, a seamstress expanding your skills, or a bridesmaid on emergency duty, this comprehensive guide will walk you through everything you need to know about creating professional-quality bustles that look absolutely flawless.
Before diving into the step-by-step process of how to make a bustle on a wedding dress, let’s gather your essential toolkit. Think of this as your bridal surgery prep station—having everything within arm’s reach will make the process infinitely smoother.
Primary Sewing Supplies:
Fastening Options:
Pro substitution tip: If you can’t find covered buttons that match your gown perfectly, swap them for clear fishing line loops paired with small, fabric-covered hooks hidden inside the skirt. This creates an invisible bustle system that’s incredibly secure.
Additional Tools:
The textures you’ll encounter—silky satins, airy tulles, structured mikados—each require slightly different handling. Delicate lace overlays feel like whispered secrets under your fingertips and demand extra care, while heavier duchess satin provides sturdy anchoring points that feel reassuringly solid.
Let’s talk realistic timelines because I’ve seen too many brides underestimate bustle creation time and end up stressed.
For beginners: Expect to spend approximately 2-4 hours on a basic American bustle. This includes planning, pinning, sewing, and multiple try-ons. I recommend spreading this across two sessions—trust me, hand-sewing fatigue is real.
For experienced seamstresses: A straightforward bustle takes about 45 minutes to 1.5 hours.
For complex French or Austrian bustles: Budget 3-5 hours regardless of skill level. These multi-point systems require precision and patience.
Compared to paying a professional seamstress (average cost: $150-$300 for bustle installation), investing a few hours saves significant money. One bride I worked with calculated she saved enough to upgrade her honeymoon hotel room—now that’s a worthwhile trade!
Studies show that 65% of alterations-related wedding stress comes from last-minute changes. I always recommend completing your bustle at least two weeks before the wedding, allowing time for adjustments and reducing those pre-wedding jitters considerably.
Before threading a single needle, you must determine which bustle style suits your gown. This isn’t just about preference—it’s about physics and fabric behavior.
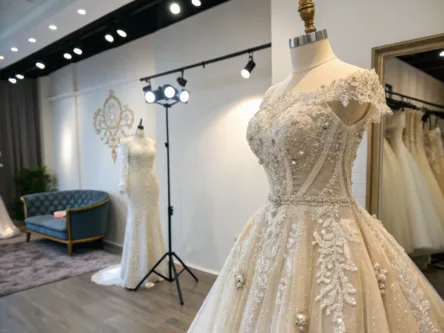
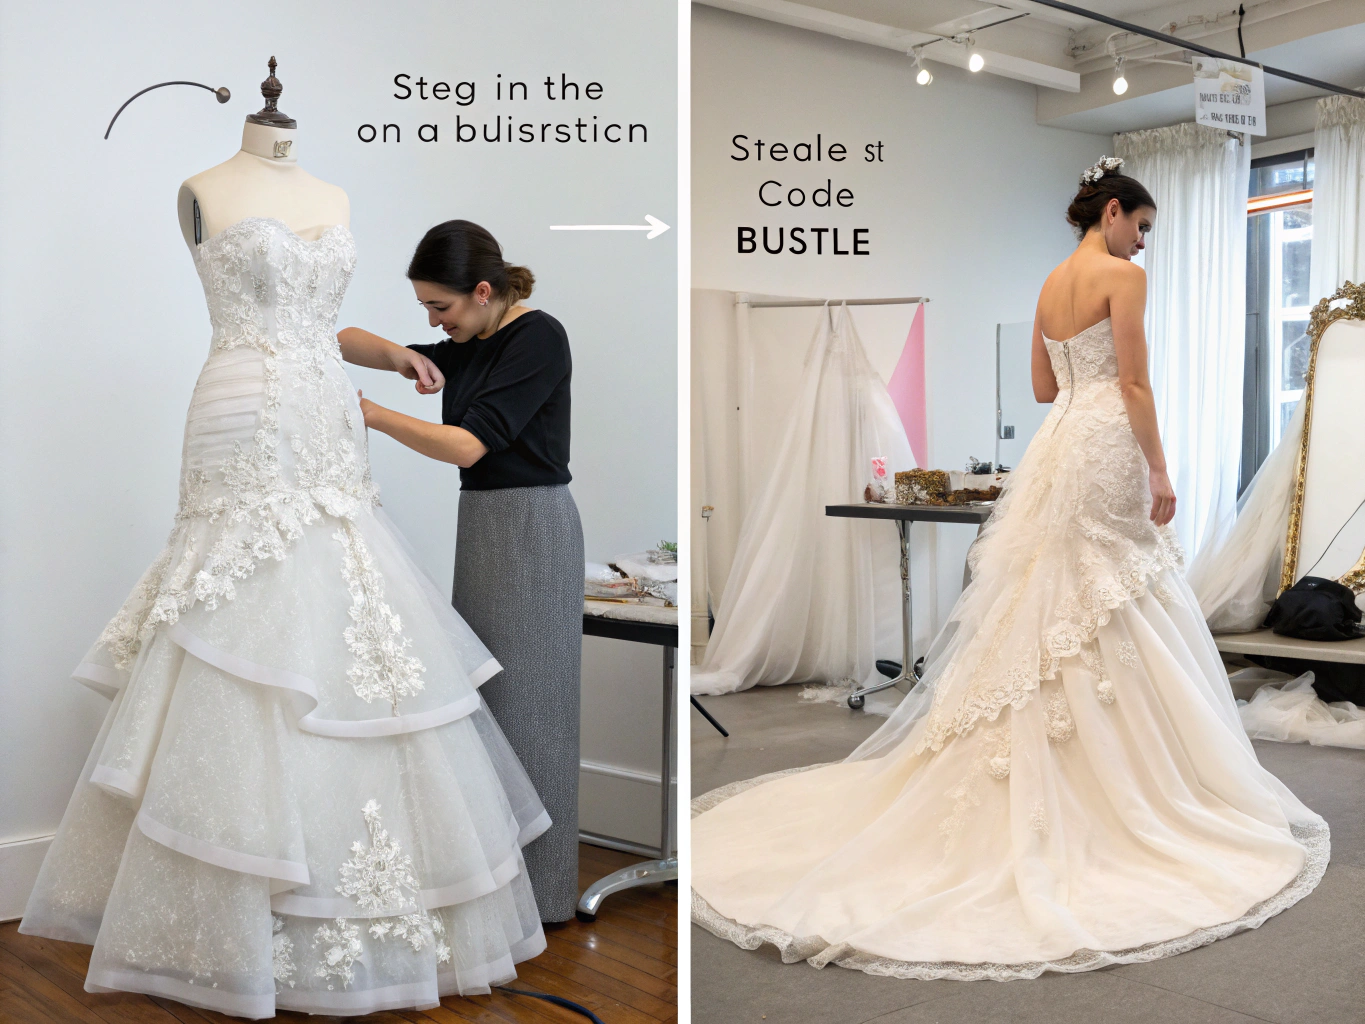
American Bustle (Over Bustle): The train lifts and attaches to the outside of the skirt, creating visible, elegant loops. Perfect for structured gowns with minimal embellishments on the train.
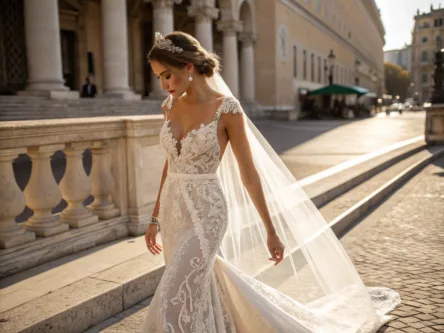
French Bustle (Under Bustle): The train tucks underneath the skirt at multiple points, creating soft, romantic draping. Ideal for gowns with lace, beading, or detailed work on the train that you want visible.
Austrian Bustle: Multiple pickup points create a gathered, ballroom effect. Stunning on flowing, lightweight fabrics like chiffon or organza.
Ballroom Bustle: A wrist loop allows the bride to carry her train—perfect for extremely long trains or when dancing is the priority.
Stylist trick: Stand in front of a full-length mirror and have someone gather your train in different positions. You’ll instinctively know which drape feels “you.”
This step separates amateur bustles from professional-looking ones. Precision here is everything.
Put on your gown with your wedding shoes and undergarments—yes, this matters for accurate hem length. Have your assistant gather the train at the center back seam, lifting it to a comfortable walking height (typically 1-2 inches off the floor).
Using chalk or disappearing ink, mark where the train’s edge meets the skirt. This becomes your primary attachment point. For French bustles, you’ll mark 3-7 points along the train’s width, spacing them evenly.
I learned the hard way that uneven marking creates a lopsided bustle that photographs terribly. Take your time, step back frequently, and ensure symmetry from multiple angles.
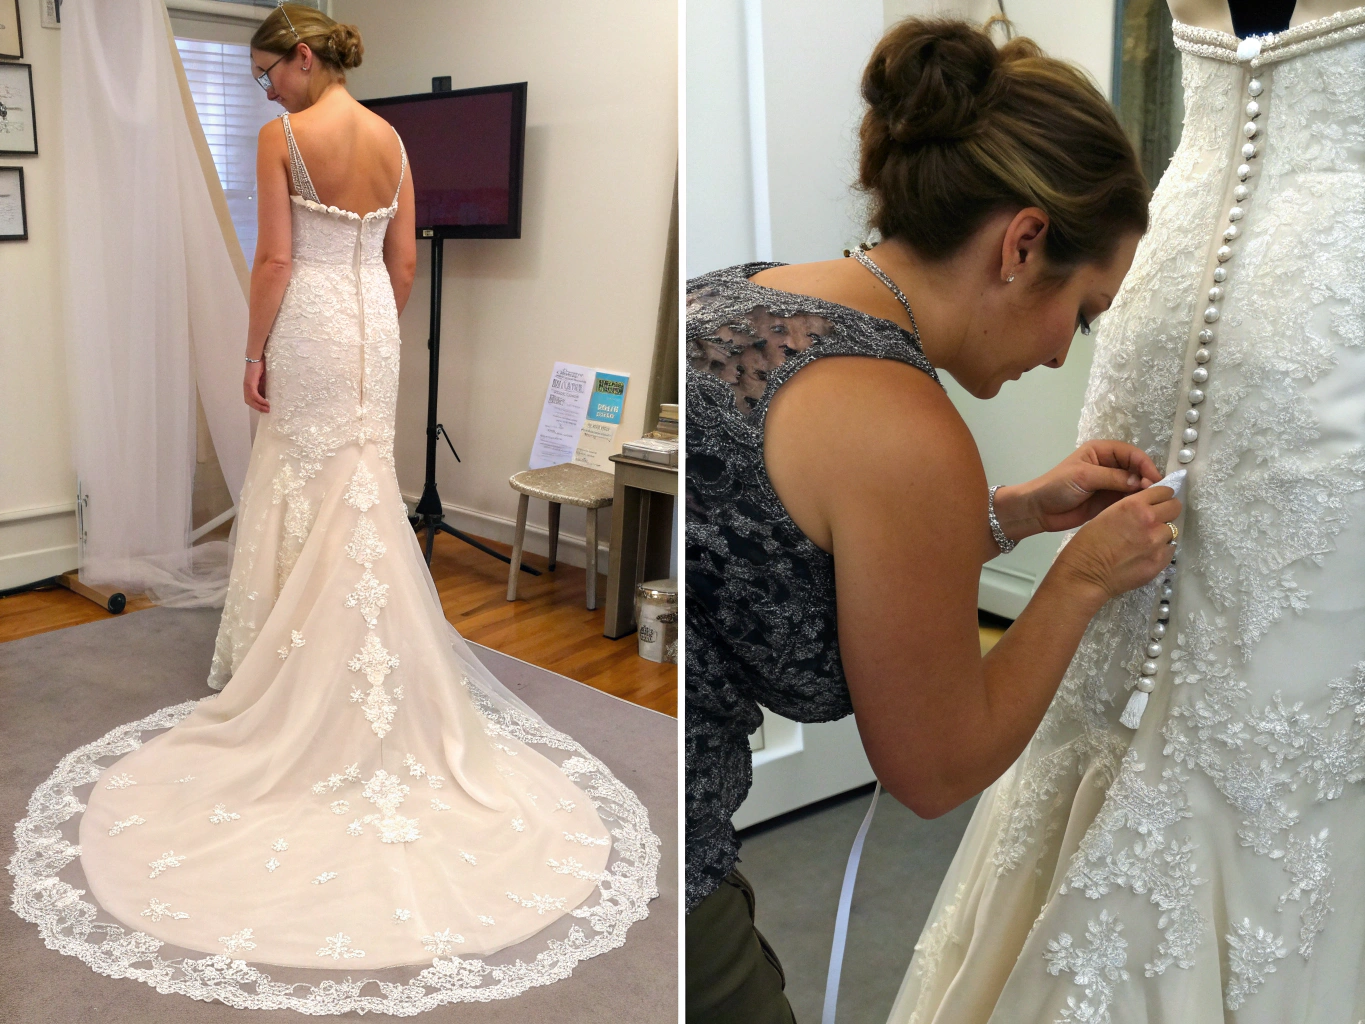
For a classic American bustle, you’ll create button-and-loop combinations. Sew a covered button (or hook) at each marked point on the skirt’s exterior. Then, create corresponding ribbon or elastic loops on the train’s underside.
Stylist secret: Reinforce every attachment point with a small fabric square behind the button. Wedding fabrics are often delicate, and the last thing you want is a button ripping through tulle mid-reception.
For French bustles, you’ll sew ribbons or fabric ties at each point—one on the train, one on the skirt’s interior—that tie together underneath.
This is where many DIY bustles fail. Surface-level stitching won’t withstand dancing, sitting, or enthusiastic congratulatory hugs.
For each attachment point, use a strong backstitch or button stitch, going through multiple fabric layers when possible. Aim for seam allowances or structured areas rather than single layers of delicate fabric.
I use approximately 15-20 stitches per attachment point, creating a reinforced foundation that could probably survive a minor hurricane. Overkill? Perhaps. But I’ve never had a bustle fail.
Before finalizing anything, test your bustle thoroughly. Put the gown on again and have someone hook or tie each point. Walk around. Sit down. Do a little shimmy (your wedding will involve dancing, after all).
Check for:
Make adjustments as needed—moving points higher, lower, or closer together until the drape looks natural and feels comfortable.
Once satisfied with placement, reinforce all temporary stitching with permanent, secure hand stitches. Use thread that matches your gown perfectly—even clear thread can catch light strangely in photographs.
For buttons, ensure they’re flush against the fabric and won’t scratch or irritate skin. For ties, trim excess ribbon and seal edges with fray check or careful heat-sealing.
Here’s what most tutorials skip: you need a bustling plan for the wedding day itself.
Write clear instructions (with photos!) for whoever will bustle your dress. Most bridesmaids have never bustled a gown before—don’t assume they’ll figure it out under reception pressure.
Practice bustling and un-bustling multiple times. Time it. A smooth bustle should take under 3 minutes. If it’s taking longer, simplify your attachment system.
Personal tip: I recommend numbering your attachment points and creating a quick-reference card. “Hook 1 to Loop 1, Hook 2 to Loop 2” is much clearer than “attach the left ribbon to the right button… no, the other right button.”
Understanding your gown’s fabric is crucial for bustle success. Different materials behave dramatically differently when gathered and secured.
Satin and Mikado: These structured fabrics create crisp, defined bustles. They hold shape well but can be heavy—ensure your attachment points are extremely secure. Studies indicate that satin is approximately 30% heavier than tulle of equivalent coverage.
Tulle and Organza: Lightweight and forgiving, these fabrics create soft, romantic bustles. However, they’re delicate—use reinforcement patches and avoid pins that might snag.
Lace: The weight varies dramatically depending on construction. Always work from the underlying fabric rather than the lace itself, which can tear under stress.
Chiffon: This dreamy fabric flows beautifully but is notoriously difficult to bustle securely. Multiple attachment points are essential, and gentle gathering prevents harsh lines.
I wore a tulle gown to a friend’s wedding last summer (not my own wedding—that’s a different story!) and was shocked at how cool I stayed despite July temperatures. Breathable fabrics make bustled skirts more comfortable because less fabric pools around your legs.
Creating your own bustle is already a sustainable choice—you’re working with what you have rather than purchasing additional construction or accessories.
Budget-Friendly Material Swaps:
Eco-Conscious Options:
If you’re purchasing a pre-owned wedding dress—which I absolutely love; sustainability and savings combined!—you might find existing bustle points that need minor repairs rather than complete installation.
For brides on extremely tight budgets, consider the wrist loop bustle. It requires minimal materials (just one sturdy loop of ribbon), creates beautiful drama, and costs virtually nothing to create.
Your bustle affects your entire silhouette, so consider how it interacts with your overall look.
For A-Line Gowns: American bustles create beautiful volume without overwhelming the shape. Pair with a simple veil that won’t compete with the gathered fabric.
For Fit-and-Flare Silhouettes: French bustles maintain the sleek line while managing the train. Consider how your bustle drape complements any back detailing—open backs look stunning with low French bustle points that draw the eye.
For Ballgowns: Austrian bustles add whimsy and movement. These pair beautifully with statement jewelry since the skirt becomes a secondary focal point.
Petite bride tip: Higher bustle points (closer to your natural waist) elongate your silhouette. Lower bustles can overwhelm smaller frames.
Tall bride tip: You have flexibility! Lower bustles create elegant, sweeping drama. Embrace that train.
Seasonal Considerations:
After years in the bridal styling world, I’ve seen these bustle mistakes repeatedly—and they’re all preventable.
Mistake 1: Insufficient Attachment Points
One or two buttons cannot support a chapel-length train. You’ll spend your reception constantly adjusting. Fix: Add attachment points until the weight distributes evenly.
Mistake 2: Ignoring Fabric Weight
Treating heavy satin like lightweight tulle results in drooping bustles and stressed stitching. Fix: Match your fastening system’s strength to your fabric’s weight.
Mistake 3: Asymmetrical Placement
Rushed marking creates lopsided bustles that look unprofessional in photographs. Fix: Use measuring tape. Check symmetry multiple times. Have a second opinion.
Mistake 4: Testing in the Wrong Shoes
Your heel height affects where your train falls and consequently where your bustle points should be. Fix: Always mark and test while wearing your actual wedding shoes.
Mistake 5: Waiting Until the Last Minute
Panic-bustles rarely turn out well. Fix: Complete your bustle at least two weeks before the wedding, with time for adjustments.
According to bridal seamstresses, 40% of last-minute alterations involve bustle repairs or modifications—don’t become a statistic.
Once your bustle is complete, proper care ensures it survives until (and after) the wedding.
Before the Wedding:
On the Wedding Day:
After the Wedding:
Pro tip: If you’re shipping your gown anywhere, stuff the bustle area with acid-free tissue paper to prevent creasing. I learned this after a destination wedding disaster—wrinkled bustles don’t photograph well.
Learning how to make a bustle on a wedding dress in 7 easy steps transforms an intimidating task into a manageable, even enjoyable project. From identifying the perfect bustle style for your gown to securing those final stitches, you now have the knowledge to create something truly beautiful.
Remember: this is about more than functionality. Your bustle is the finishing touch that carries you from ceremony elegance to reception celebration. It’s the detail that lets you dance freely, sit comfortably, and move through your wedding day without worrying about your train.
Whether you’re tackling a simple American bustle or an intricate French design, trust the process, take your time, and don’t hesitate to ask for help. Every stunning wedding gown you’ve ever admired at a reception had someone behind the scenes ensuring that bustle was perfect—now, that someone can be you.
Ready to try this yourself? Share your bustle creations with us, tag your photos, and explore our other wedding styling guides for more inspiration. Your perfect wedding day look is absolutely within reach!
Most gowns require 2-7 bustle points, depending on train length and fabric weight. Chapel-length trains typically need 3-5 points, while cathedral trains may need 7 or more. When in doubt, add more points—distributed weight is easier on fabrics and holds more securely.
Yes! Every train can be bustled, though the method varies. Mermaid and fit-and-flare silhouettes work best with French bustles, while ballgowns and A-lines suit American or Austrian styles. Even detachable trains benefit from a simple bustle option.
Heavy embellishments mean heavier fabric—you’ll need more attachment points and stronger fastening systems. French bustles work wonderfully for beaded trains because the details remain visible when tucked underneath. Always attach to the underlying fabric structure, not the beadwork itself.
Test it! Put on the gown, bustle it, then move vigorously. Sit, stand, bend, and dance. If anything shifts or loosens, add reinforcement. A proper bustle should feel secure enough that you forget about it entirely during your reception.
Absolutely! Basic bustles require only fundamental hand-sewing skills. Start with a simple American bustle using the hook-and-loop method. If you can sew a button, you can create a functional bustle. Complex French bustles may require more practice, but they’re still achievable with patience.
Complete your bustle at least two weeks before the wedding. This allows time for adjustments, practicing the bustling process, and ensuring whoever will bustle your dress on the day is comfortable with the mechanism. Last-minute bustles create unnecessary stress.


 20Jan
20Jan  21Jan
21Jan  05Feb
05Feb  06Feb
06Feb  06Feb
06Feb  12Feb
12Feb