No products in the cart.
 05Feb
05Feb 

Did you know that 78% of brides require at least some alterations to their wedding dress, regardless of whether it’s custom-made or purchased off the rack? This surprising statistic from the Wedding Report reveals a truth that catches many brides off guard during their planning journey.
If you’re wondering how long does it take to alter a wedding dress, you’re certainly not alone. This question keeps countless brides up at night, especially when timelines feel impossibly tight and the pressure of the big day looms ahead.
I remember sitting in my own alterations appointment, nervously clutching my grandmother’s vintage lace handkerchief, completely unprepared for the journey ahead. My seamstress smiled knowingly and said, “Sweetheart, great alterations are like great love—they take time, patience, and the right fit.”
Understanding how long does it take to alter a wedding dress: 7 key factors that influence your timeline can transform wedding planning stress into confident preparation. Whether you’re six months out or scrambling with just weeks to spare, this comprehensive guide will walk you through everything you need to know about wedding dress alterations, timing considerations, and insider tricks that professional stylists swear by.
The truth is, wedding gown modifications aren’t a one-size-fits-all timeline. Factors ranging from your dress’s construction complexity to your seamstress’s booking schedule all play crucial roles. Let’s dive into the essential details that will help you plan with precision and peace of mind.
Before you step into your first fitting, preparing the right essentials ensures your alterations appointments run smoothly and efficiently. Think of this as your bridal alterations survival kit—items that will make each fitting more productive and help your seamstress work their magic.
Essential Undergarments:
Footwear Foundations:
Comfort & Practical Items:
Emotional Support Essentials:
The textures of your chosen undergarments—whether silky smooth shapewear or a structured corset—directly impact how your bodice sits and how your seamstress pins adjustments. I’ve seen brides show up in sports bras and flip-flops, only to realize their dress looks completely different with proper foundation pieces. Don’t make this rookie mistake.
Understanding the realistic timeline for wedding dress alterations helps you plan backwards from your wedding date with confidence. According to data from the Association of Wedding Gown Specialists, the average alterations process takes 4-8 weeks from start to finish, though complexity varies dramatically.
Standard Timeline Breakdown:
| Alteration Type | Typical Duration | Number of Fittings |
|---|---|---|
| Simple hemming | 2-3 weeks | 1-2 fittings |
| Bodice adjustments | 3-4 weeks | 2-3 fittings |
| Complex restructuring | 6-8 weeks | 3-5 fittings |
| Adding embellishments | 4-6 weeks | 2-3 fittings |
| Full customization | 8-12 weeks | 4-6 fittings |
Comparing this to real-life scenarios: scheduling your first alterations appointment 8-12 weeks before your wedding gives you comfortable breathing room, similar to how building a capsule wardrobe saves precious morning minutes. One bride I worked with started alterations just three weeks before her ceremony—the rush fees alone added $400 to her bill, and the stress was palpable.
Peak Season Considerations:
During wedding season (April through October), alterations shops book up quickly. A 2023 survey by WeddingWire found that seamstresses during peak months are booked 45% further in advance than during off-season months. Starting early isn’t just recommended—it’s essential.
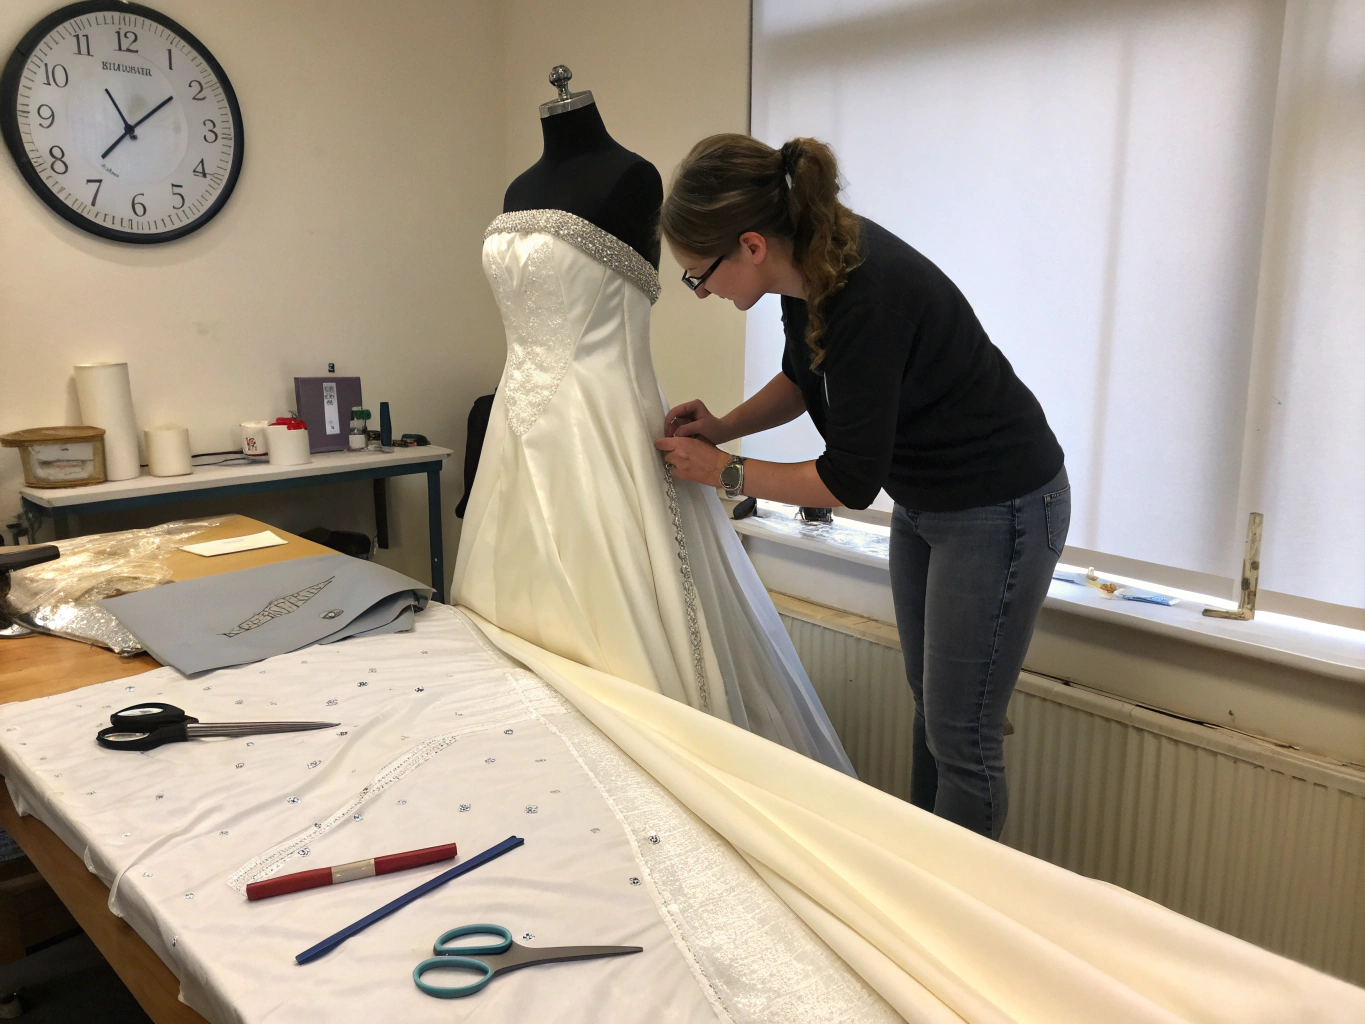
Your first alterations appointment should happen the moment your dress arrives, ideally 10-12 weeks before your wedding. During this session, your seamstress will assess every aspect of fit: bust, waist, hips, and length.
Stylist trick: Stand naturally during measurements rather than sucking in your stomach or adjusting your posture. Your seamstress needs to see how the dress fits your authentic body, not your “picture-ready” pose.
This is where communication becomes everything. Bring inspiration photos, explain how you want to feel (ethereal? glamorous? vintage?), and voice any concerns about specific areas. Maybe the sleeves feel too tight, or you’re worried about dancing comfortably.
I always tell brides: “Your seamstress can’t read your mind, but they can absolutely create magic when they understand your vision.” Be specific about what you love and what makes you uncomfortable.
During this appointment, your seamstress pins adjustments without making permanent changes. You’ll see the potential transformation taking shape. This fitting typically lasts 45-60 minutes.
Pro tip: Practice sitting, raising your arms, and doing a gentle twirl. These movements reveal fit issues that standing still never would.
After initial sewing, you’ll return to verify adjustments. This is your opportunity to request minor tweaks—perhaps the hem needs another quarter inch, or the bust cups require slight repositioning.
Your last appointment should feel like pure joy. Everything should fit perfectly, move comfortably, and make you feel absolutely stunning. Most seamstresses schedule this 1-2 weeks before the wedding.
Stylist secret: Bring your veil, jewelry, and any accessories to this fitting. Seeing the complete look builds confidence and catches any last-minute coordination issues.
Once alterations are complete, spend 30 minutes at home wearing your full ensemble. Practice walking, sitting, using the restroom (seriously—this matters), and hugging. You’ll thank yourself on your wedding day.
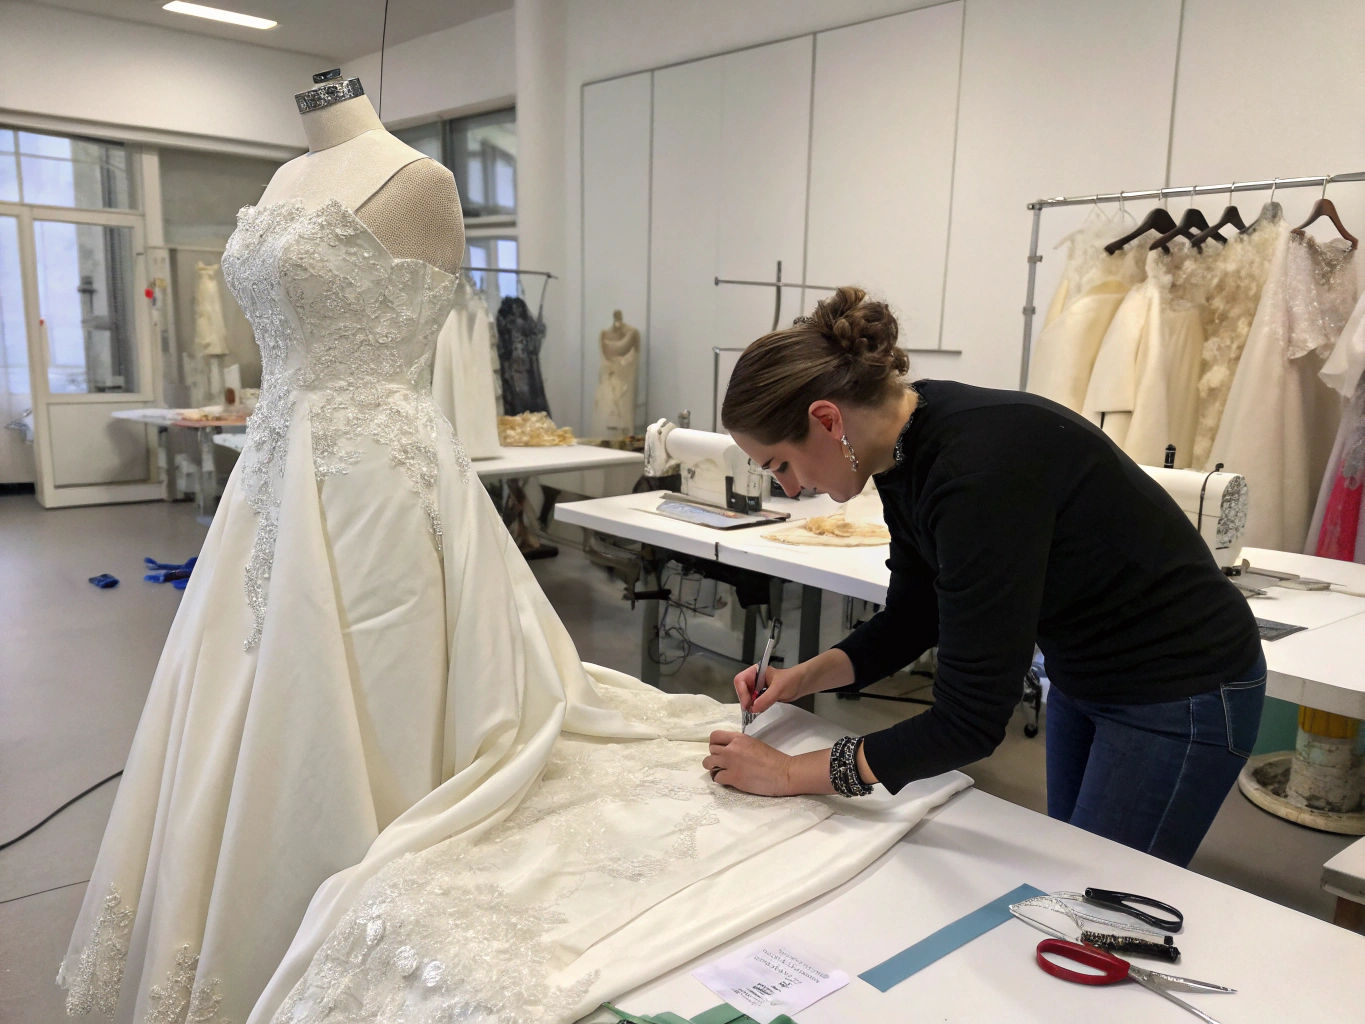
The fabric composition of your wedding dress dramatically impacts both alterations complexity and overall comfort on your big day. Understanding these elements helps you communicate effectively with your seamstress and set realistic timeline expectations.
Fabric Considerations:
Experiential note: I attended a summer outdoor wedding wearing a fully lined satin gown before understanding fabric breathability. Within an hour, I was overheating. For my own wedding, I specifically requested a silk chiffon blend, and the difference was remarkable—light, flowing, and surprisingly comfortable even during August humidity.
Construction Complexity:
Boned bodices, multiple petticoat layers, cathedral-length trains, and intricate beadwork all extend alterations timelines. A simple A-line silhouette might require just two fittings, while a structured ballgown with hand-sewn crystals could demand five appointments over eight weeks.
Wedding dress alterations range from $150 for simple hems to $1,500+ for extensive modifications. However, creative approaches can deliver stunning results without devastating your budget.
Budget-Friendly Options:
Sustainable Considerations:
Brand mention: Companies like BHLDN and Reformation offer dresses designed for easy alterations, with simpler construction that reduces modification costs by approximately 25% compared to heavily constructed couture gowns.
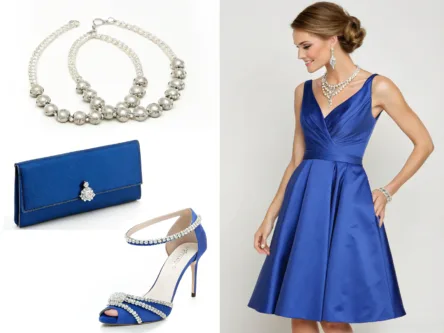
Once your dress alterations are complete, thoughtful accessory selection elevates your entire bridal look. The key is choosing pieces that work harmoniously with your dress’s new silhouette.
For Modified Necklines:
For Adjusted Hemlines:
Seasonal Versatility:
Personal Styling Note:
When I had my own dress altered to remove cap sleeves (they photographed awkwardly on my narrow shoulders), my seamstress suggested statement earrings to frame my face differently. That small recommendation transformed how I felt in photos. Trust your alterations professional’s eye—they understand visual balance intuitively.
Even the most prepared brides sometimes stumble during the alterations process. Here are the pitfalls I’ve witnessed most frequently—and how to sidestep them gracefully.
Mistake #1: Waiting Too Long to Start
Nearly 23% of brides report feeling rushed during alterations due to late starts. Book your first appointment immediately upon dress arrival. Period.
The fix: Set a calendar reminder for the day your dress is expected to arrive, with your seamstress’s contact information ready.
Mistake #2: Dramatic Weight Change Expectations
Planning to lose 20 pounds before your wedding? Your seamstress needs you to be realistic. Significant body changes mid-alterations require starting over, costing time and money.
The fix: Get altered for your current body. Most dresses can be taken in slightly if you do lose weight, but letting out is far more limited.
Mistake #3: Forgetting Foundation Garments
The difference between a sports bra and a properly fitted strapless bustier can be two cup sizes and completely different measurements.
The fix: Purchase undergarments before your first fitting, not after.
Mistake #4: Overcrowding Fitting Appointments
Bringing your entire bridal party creates chaos and conflicting opinions. Too many voices confuse both you and your seamstress.
The fix: Limit attendance to one or two trusted individuals whose opinions you genuinely value.
Mistake #5: Skipping the Movement Test
Standing still looks beautiful, but your wedding involves walking, dancing, hugging, and sitting. Alterations must accommodate real-life movement.
The fix: During every fitting, move naturally. Sit down, raise your arms, twist at the waist. Identify restrictions before they’re sewn permanently.
After investing time and money into perfect alterations, proper care ensures your dress remains flawless until your wedding day—and beyond.
Pre-Wedding Storage:
Traveling With Your Gown:
Day-Of Care:
Pro tip I swear by: Hang your dress in the bathroom during a hot shower the night before your wedding. The steam gently releases any storage creases without risking water damage. I’ve recommended this trick to dozens of brides, and it works beautifully every time.
Post-Wedding Preservation:
Within two weeks of your wedding, have your dress professionally cleaned and preserved. Alterations like hems that touch the ground collect invisible debris that yellows over time if not addressed promptly.
Understanding how long does it take to alter a wedding dress and the 7 key factors that influence your timeline transforms wedding planning anxiety into confident preparation. From fabric complexity and seamstress availability to your own body changes and seasonal demand, each element plays a crucial role in creating your perfect fit.
The golden rule? Start early, communicate clearly, and trust the process. Your alterations journey is as much about how you feel in your dress as how it technically fits. The right seamstress becomes your ally in crafting the vision you’ve imagined.
Remember these essential takeaways:
Your wedding dress deserves the attention to detail that proper alterations provide. When you walk down that aisle, you should feel confident, comfortable, and absolutely radiant.
Ready to dive deeper into wedding planning? Explore our guides on [bridal accessory styling], [wedding day emergency kits], and [seasonal wedding fashion trends]. Share your alterations experience in the comments below—we’d love to hear your journey!
Most wedding dress alterations take 4-8 weeks from first fitting to final pickup. Simple adjustments like hemming might take just 2-3 weeks, while complex modifications involving structural changes, adding sleeves, or extensive beadwork can extend to 10-12 weeks. Always plan for more time than you think you’ll need.
Ideally, schedule your first alterations appointment 10-12 weeks before your wedding date. This timing provides comfortable cushion for multiple fittings, unexpected complications, and your seamstress’s schedule. During peak wedding season (April-October), consider starting even earlier due to higher demand.
Most brides require 2-4 fittings. A standard timeline includes an initial consultation/pinning session, a mid-point fitting to verify adjustments, and a final fitting to confirm perfection. Highly complex dresses or significant modifications may require 5-6 appointments.
Yes, but expect to pay rush fees of 25-50% above standard rates. Most seamstresses can accommodate urgent timelines of 2-3 weeks for straightforward alterations. However, quality may be compromised with extremely tight deadlines. If you’re under significant time pressure, communicate immediately with your seamstress about priorities.
Alterations range widely from $150 to $1,500+ depending on complexity. Simple hemming averages $75-200, bodice adjustments run $150-400, and comprehensive restructuring (adding sleeves, changing necklines, extensive beading) can reach $800-1,500. Always request a detailed estimate during your initial consultation.
Both options have merits. Salon services offer convenience and often guarantee work since they know their dresses intimately. Independent seamstresses typically charge 20-40% less and may provide more personalized attention. Ask for referrals, review portfolios, and choose based on experience with your specific dress style.
Communicate immediately with your seamstress. Most dresses can be taken in 1-2 sizes relatively easily, but letting out is limited by seam allowances (typically only 1 size maximum). Significant weight changes mid-alterations may require starting over or accepting compromise fits. For best results, maintain stable weight throughout the alterations period.

 17Feb
17Feb 


 05Feb
05Feb  06Feb
06Feb  06Feb
06Feb  12Feb
12Feb  13Feb
13Feb  14Feb
14Feb